Cyberdeck 8: I Believe In Progress
A post where Steve has actually done some hardware gubbins. Hurrah!

Shamelessly I used this title to shoehorn in this, a favourite track from a favourite band.
I've been making progress! When last we spoke I had the top bit sort of roughly looking how it should, and the missive prior I mentioned the plywood base plan. I've built on both, and it makes sense to look at the plywood base first.
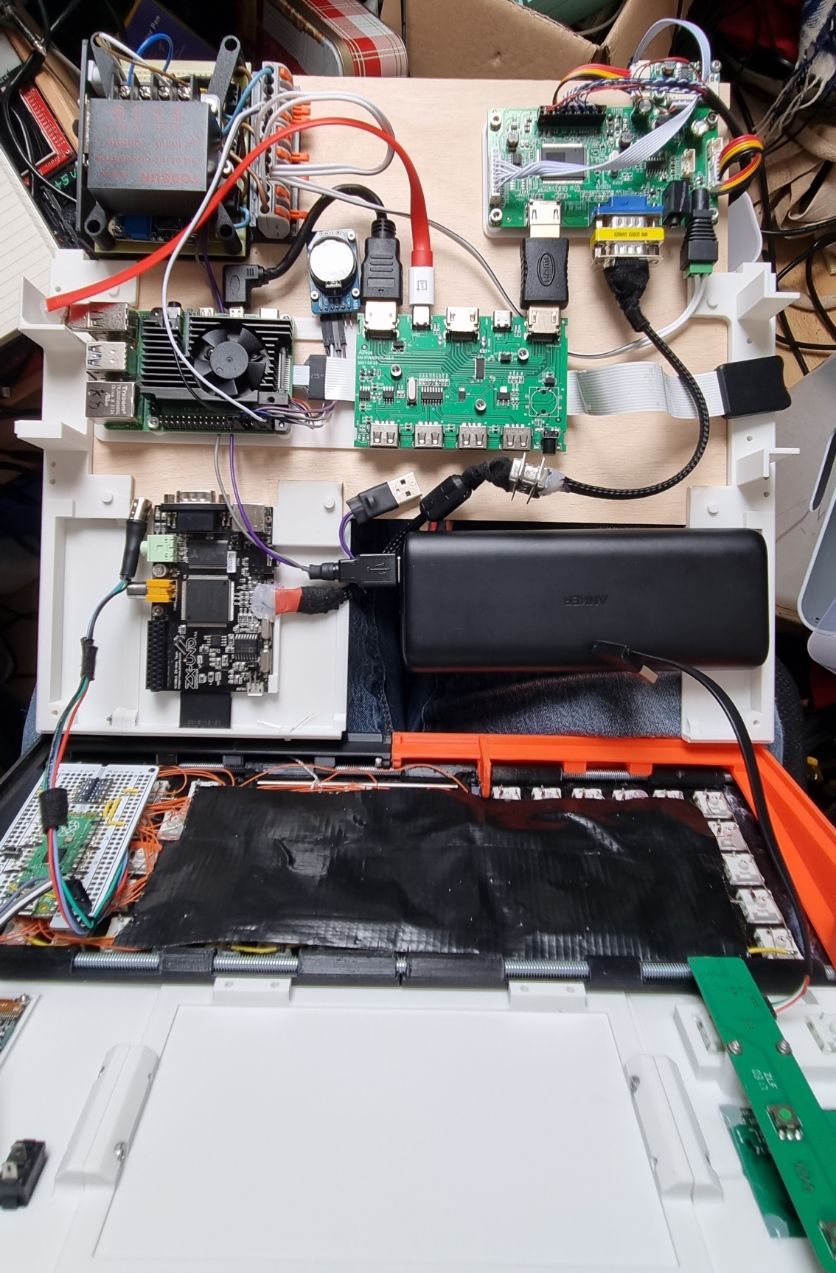
A bit of an overwhelming jumble there, but that's things mounted (or not yet mounted in the case of the battery) where they're probably ending up. There's going to be tweaks to the top for the screen controls and the KVM switch but I think this is pretty much the layout for the bottom. Since taking this photo I've made a proper battery tray with tie-downs for velcro strips to hold it secure. The ZX Uno board is positioned so that a micro SD card can be accessed from the front through a captive SD card adaptor and the Pi's micro SD card is accessed via the extension to the right hand side. I've had an idea for a while to have a secure drawer for micro SD cards so that I can flick between distros - I might still do that.
There's still a need for the joystick for the ZX Uno and some kind of communication between the two halves would be nice. The proper thing to do would be to have a serial connection between them; the hacky way would be to abuse the keyboard status LEDs and use them to transfer data (which isn't a million miles from what Codemasters did with their 8-bit CD game pack, except that used a joystick port and was obviously unidirectional).
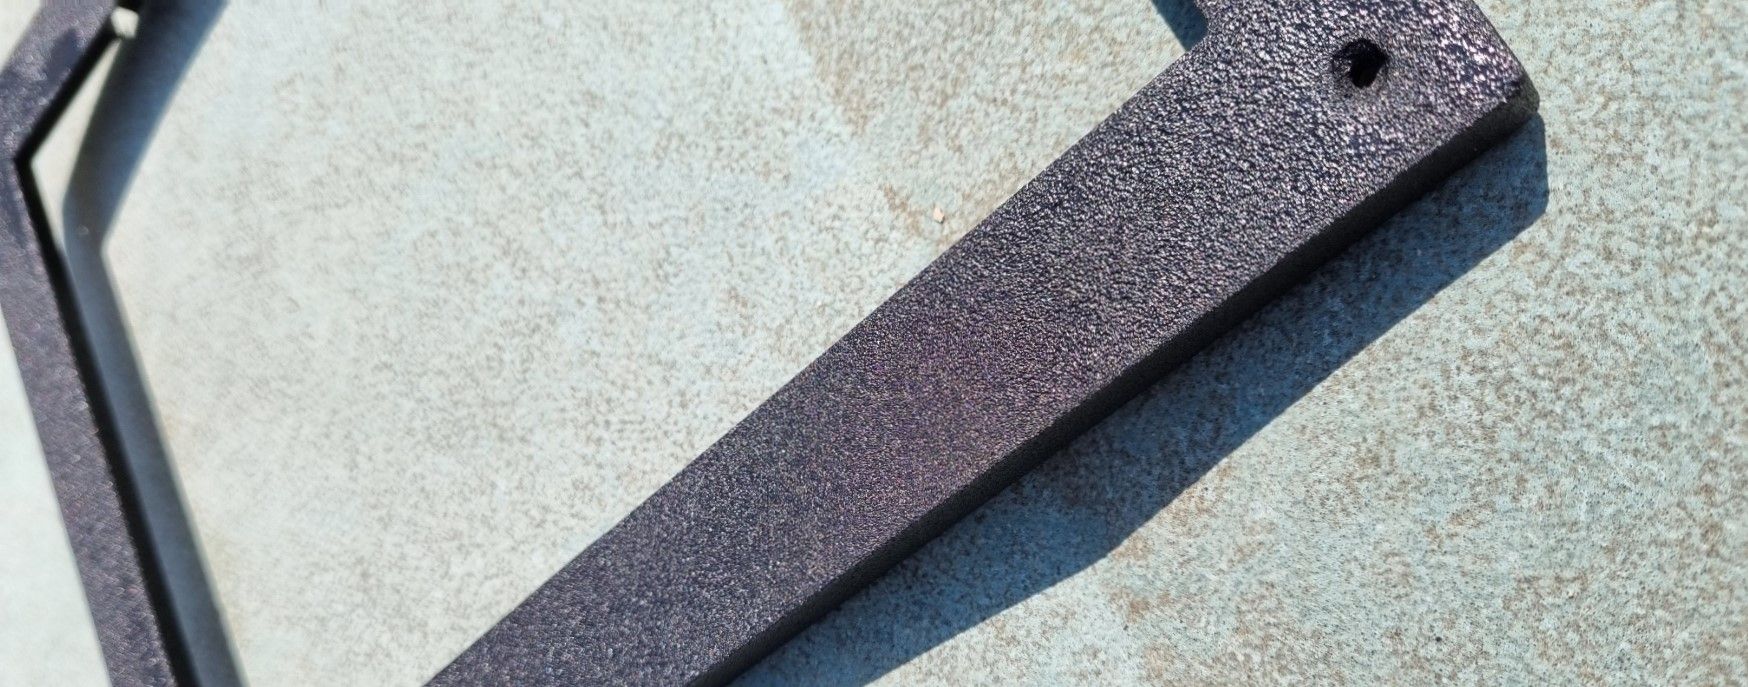
That paint
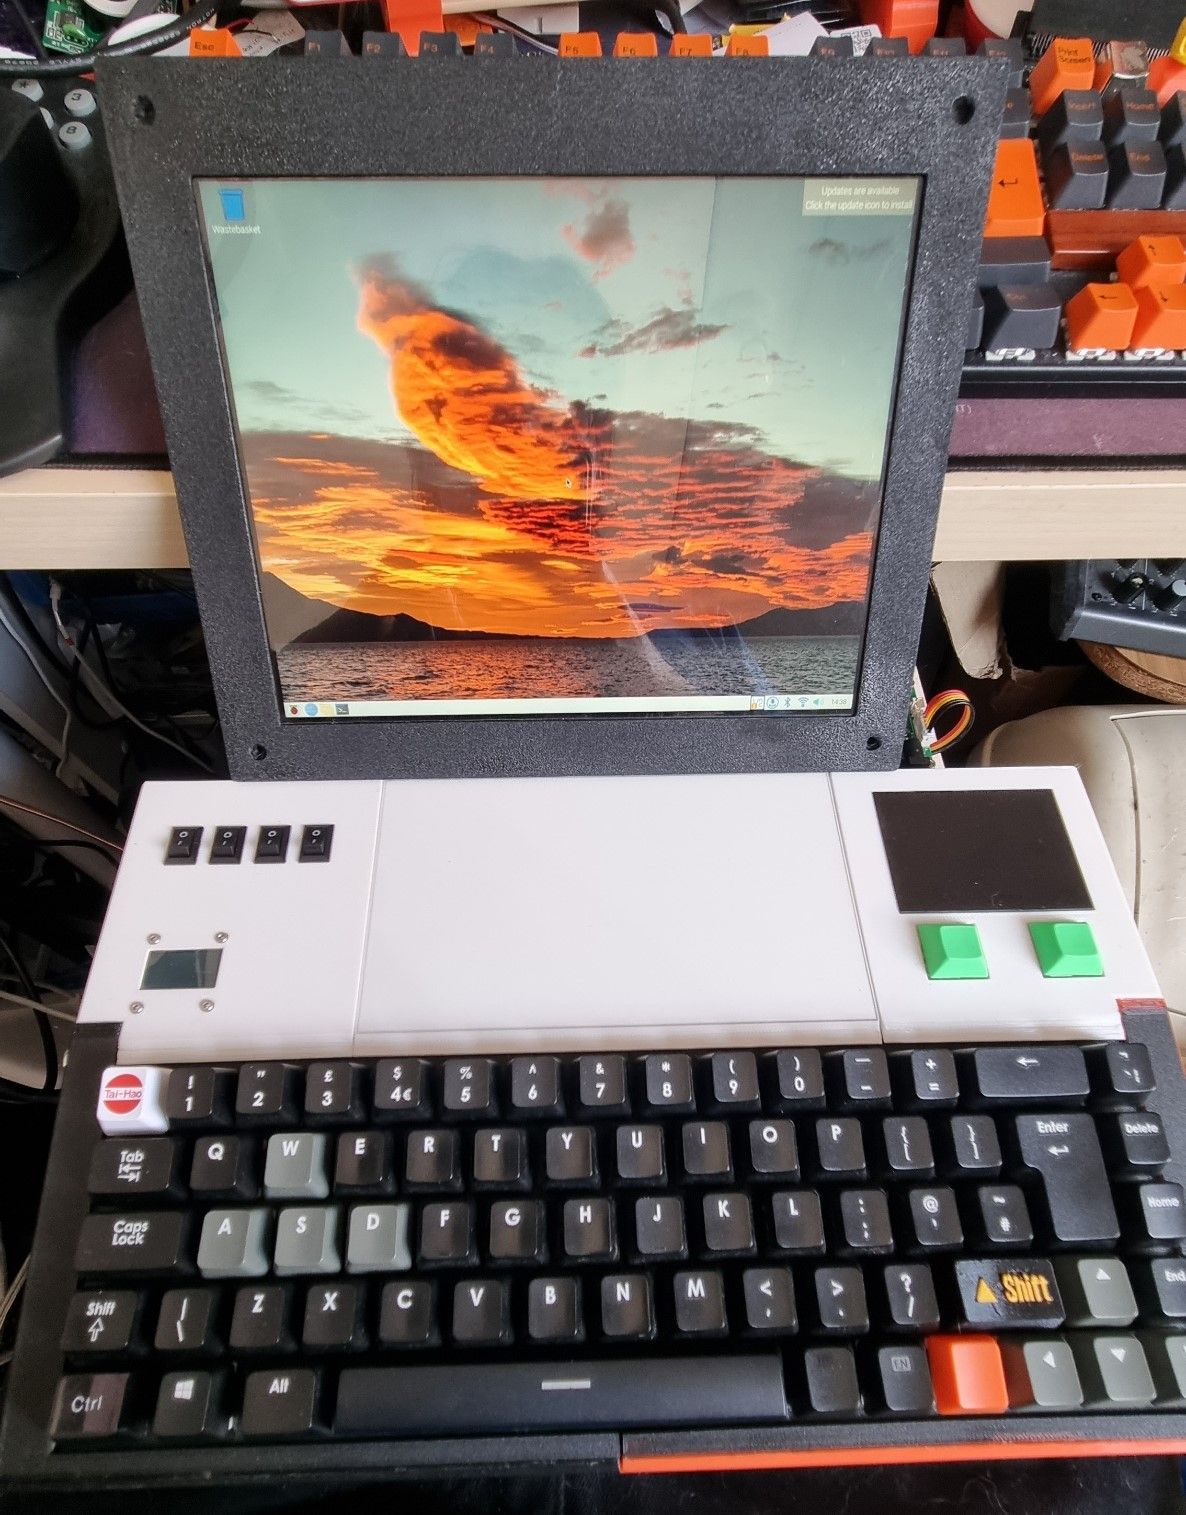
I reported on the truck bed liner paint idea previously, and I tried it out as you can see at the top of this post. That's two pieces of white 3D printed plastic, joined together with superglue and some plastic welding (scrap PLA filament and a soldering iron to bond), a smidge of wood filler, a tiny amount of sanding and a single coat of the paint. It's amazing stuff! The texture it provides is almost identical to the back of a rubber-keyed Spectrum and it hides the join better than I could've imagined. The painted object is the screen bezel, which being too big for the printer had to be made in two halves, and one of the joins is on the bottom section in that photo - you can't see it can you?
The screen and attaching it
When I designed the bezel I factored in the thickness of the PET screen protection as well as the display module itself and I got the dimensions bang on, so then I needed to work out how to connect it to the main computer bit. I'd been thinking of using bearings on the threaded rod that will be bracing the back, but there wasn't really enough cable to get it to the middle and having it to the side looked weird.
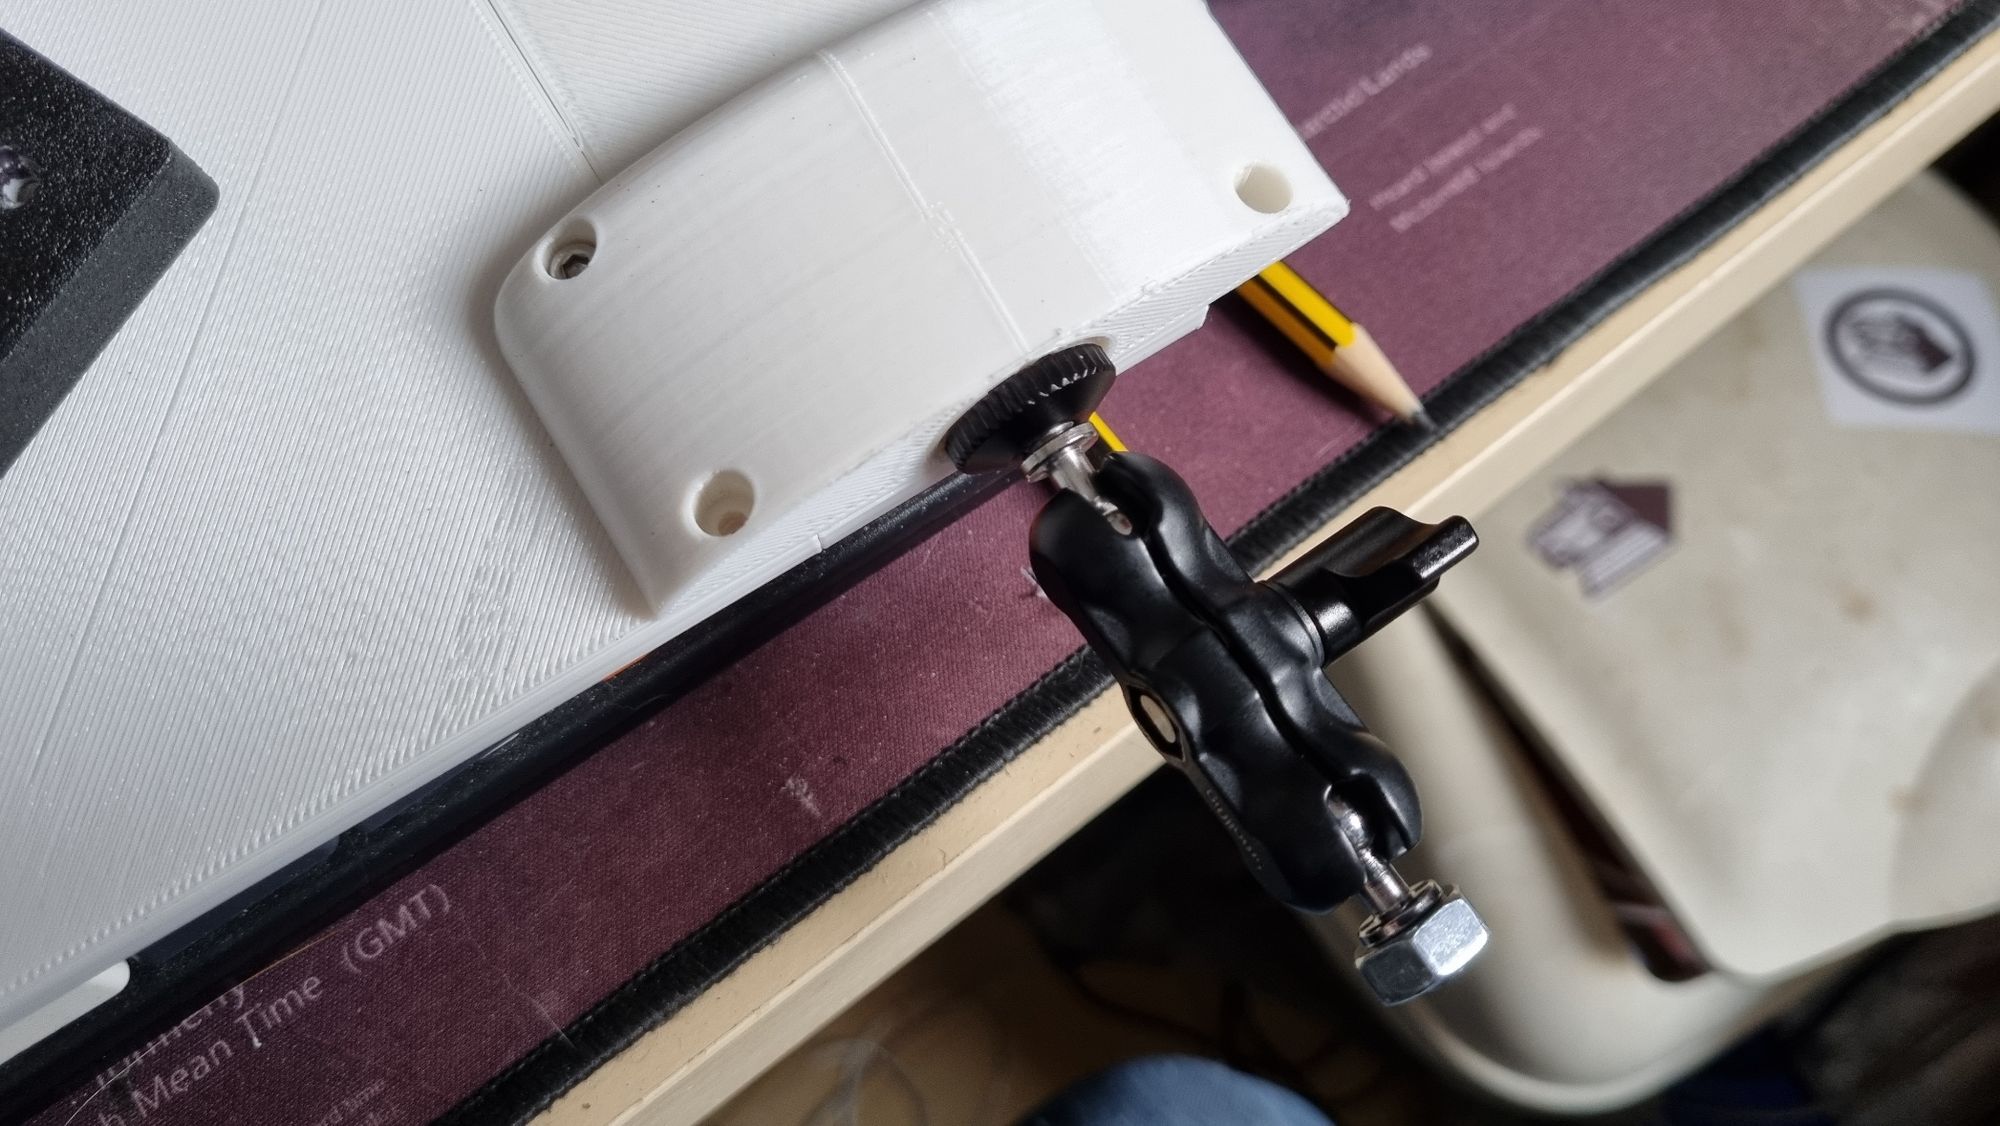
Inspiration hit me from... somewhere, I dunno. It just did! I have a couple of magic arms that I use for things like holding a camera to the 3D printer frame and small video monitors and I realised that I could use something like that and articulate the screen how I like. A quick trip to eBay and I scored one of these, dead cheap.
With that settled I could work out the back of the screen. A ¼" nut would take the thread of the tripod screw, and knowing about the torque that could be in play (and not wanting it to be a load-bearing display module) I worked out some bracing to hold the parts together.
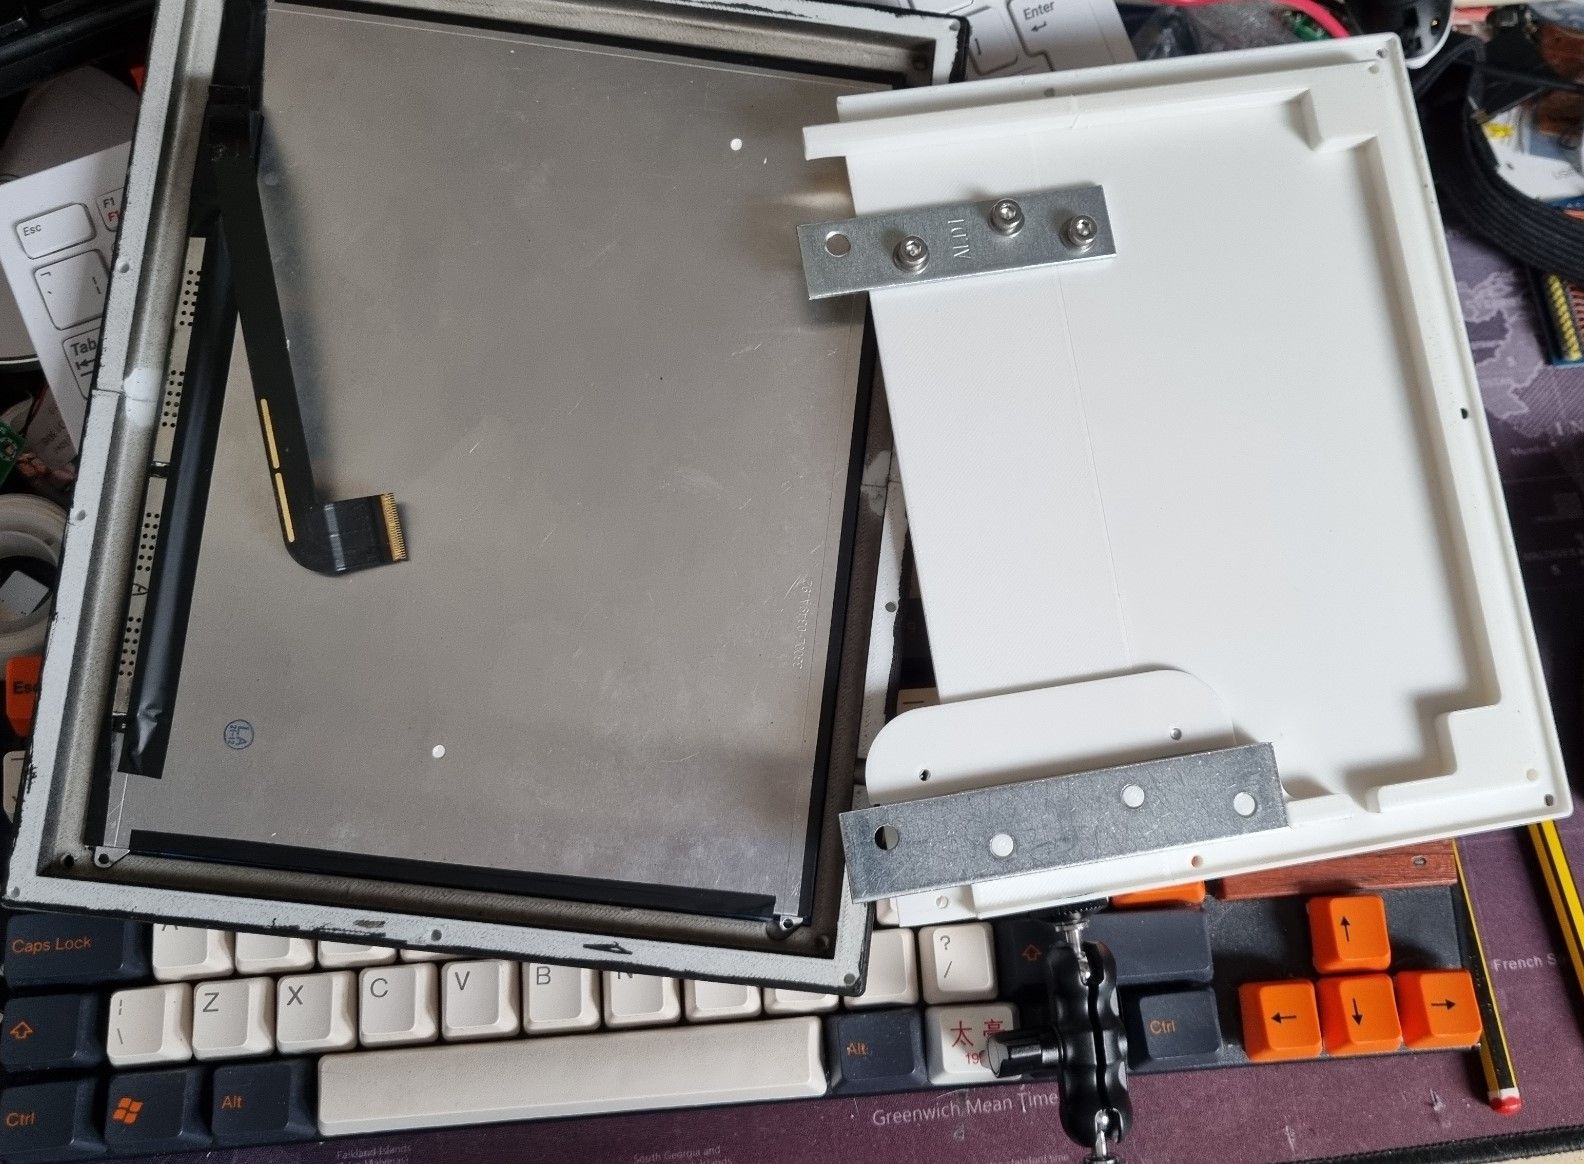
The back is made up of three panels, so that the join isn't in line with the front, and a separate section that holds the nut and helps clamp the side panel to the centre one. (The photo above is the centre and right panels, the left one will get printed tomorrow.)
The metal brackets are from a bag I got in Aldi ages ago and give more rigidity. The top one is bolted to the panels, and the bottom one provides strength to the back of the display module directly.
On the base I'll probably use another reinforced print to hold the other ¼" nut to the bracing at the back. I'll work out what to do there once I've got that section designed in a bit more detail.
Audio
I've been putting the speaker situation off for too long. I'd wanted a mixer so that both Pi and Spectrum sound could be heard at the same time - I might still do that - and figured I'd use some junked laptop speaker modules or something. Then this came up on Banggood for £cheap and I decided that I could use that instead.
It would be handy to have the audio from external HDMI sources coming through as well. Sadly there's no headphone output on the display driver board, but there's some speaker headers which might just give a clean enough signal to pull out and use. The alternative would be to use an HDMI audio extractor - you can get them very cheap and they work reasonably well - but it would be another thing to have to try and fit into the signal path and you don't know whether or not it will handle more than 1080P without actually trying it.
That's all for now
I'll just continue chipping away until next update!