Cyberdeck Progress Report
In which Steve shows off some ridiculous homemade portable computer thing

Well, in my first post I mentioned that I was making a Cyberdeck. Bit by bit I'm hacking away, refining and plotting. I have loose plans that solidify as I experiment, so it's quite organic. Here's a rundown on things.
Keyboard
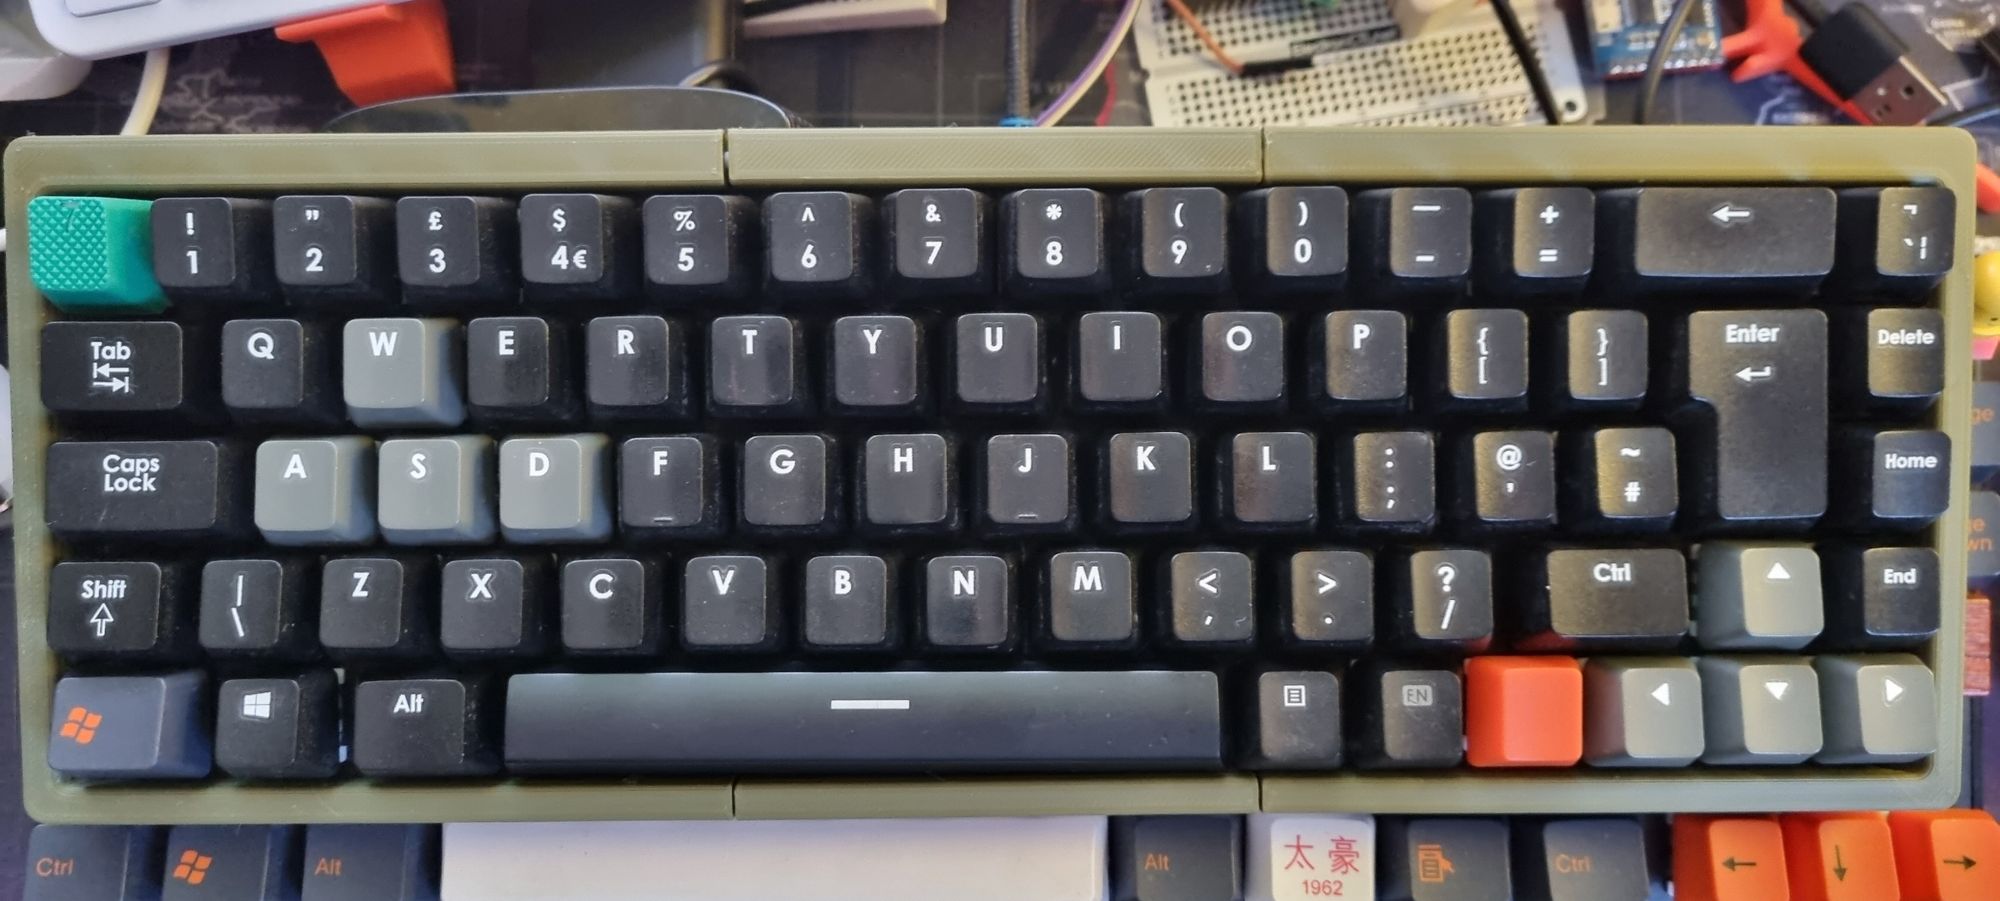
I'm making my own keyboard. This is a necessity, because I need to be able to output a PS/2 keyboard signal as well as a USB one, and that's something that you can't just get any more it seems. It has to be mechanical (because once you clack there's no going back), and compact without losing too much 'normality'. I want a UK ISO layout, because ANSI is rubbish. (Why does the |\ button get so much extra space on those?)
In the photo above you can see the prototype, based on a model I found on Thingiverse, but I needed to make lots of tweaks and editing the downloaded files is a pain, so I ended up redoing the whole thing myself by creating the layout in an online tool, exporting it as an SVG and importing it into Fusion 360. The keyboard plate has to be printed in two halves which means it's a bit bendy and needs bracing, so I've made that a feature and have threaded rods running laterally across the keyboard with locknuts on the ends. It does the trick quite nicely so I'll be extending that to the main body, whatever I decide to do there.
The surrounding case has to be printed in multiple parts as well, obviously, so again I've made it a bit of a feature, with seams celebrated (because there's no escaping them). Whereas the keyboard plate is printed in black PETG for strength, the case is army green matte PLA. It's coming out ok, not brilliant, but I'm probably going to retain the flaws rather than spending hours and hours sanding away and getting annoyed. This thing is supposed to look weathered after all.
I'm going to have to write the keyboard firmware myself, as there's nothing off-the-peg I can turn to achieve what I need (barring some low level helper libraries). To do this I'll be using a Raspberry Pi Pico, programmed in Arduino, and will have a way of switching between USB output and PS/2. Before I can do that though, I need to wire up the key matrix, and before that I have to get enough of the case done that I can be sure it works for me.
Originally I'd had plans on using some funky keycaps, but they cost money - especially when you don't want ANSI - so I've slapped on some keycaps I had (the ones from my old Corsair keeb). Meanwhile, the switches came from a donor keyboard I got dirt cheap on eBay, and are the same as the ones in the keyboard I use every day (and you can see underneath the prototype). I bought it in case it could do PS/2 for me and got it cheaper than buying the same quantity of the switches new, so I won regardless.
Screen
Originally I had planned on using a 7" display I've had for ages as the display for this, and had it measured out, mounted and ready to go, but the viewing angles are pretty garbage, especially vertically. What it had, though, was both HDMI and VGA inputs, which is (again) a necessity for this build. What to do?
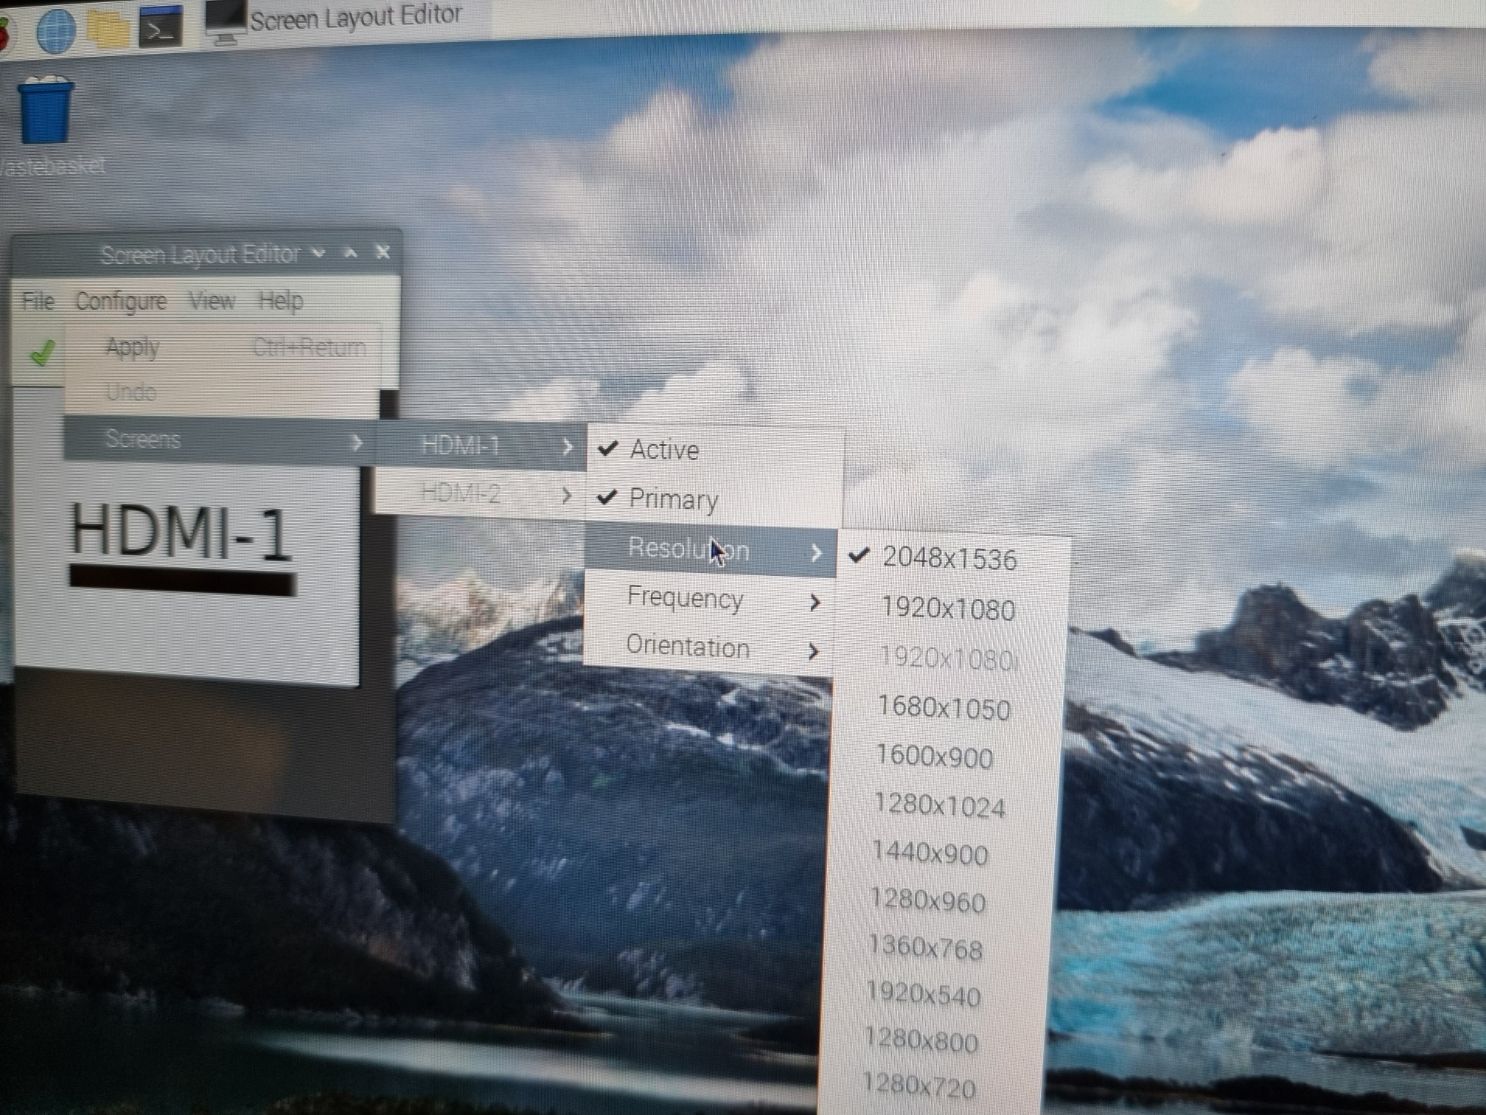
Well, I'd stumbled across using iPad screens with driver boards to get 9.7" displays recently, and it's a cheap way to get a really good screen. The iPad 3 was the first with a retina display, meaning you get a resolution of 2048x1536 in a 4:3 ratio. When I found a driver board with VGA as well as HDMI, I went for that.
So why VGA, and why PS/2? Well...
Motherboard(s)
I decided I wanted more than one device in this build. Like most Cyberdeck builds I've got a Raspberry Pi doing the main job - a Pi 4 hooked up to the HDMI input and USB side of the keyboard. But that's not all - I'm going back to my roots by making something that 1980s Steve wouldn't believe at all. There's going to be some 8-bit goodness in there, courtesy of the ZX-Uno board.
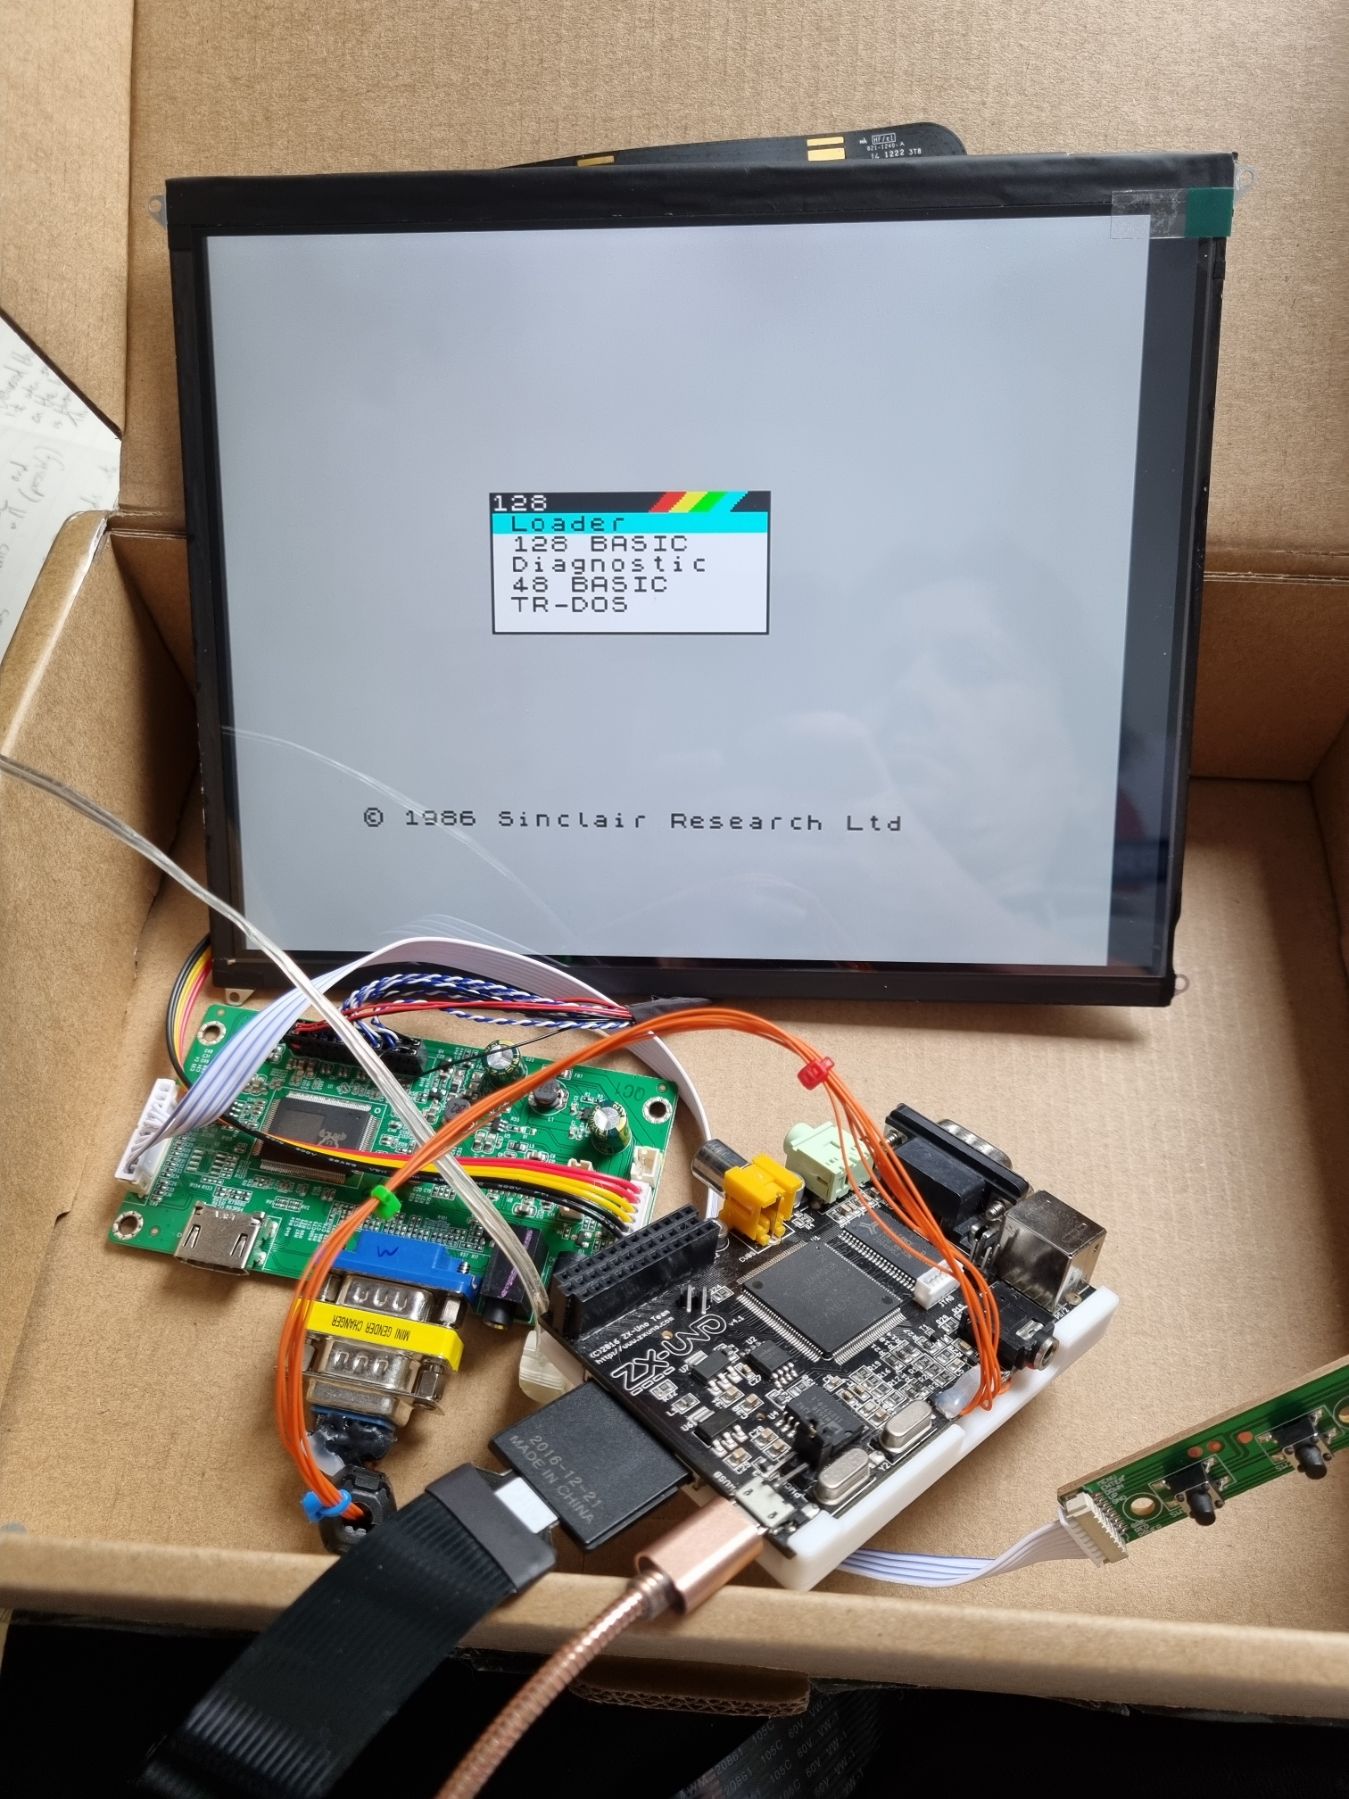
The ZX-Uno is an FPGA implementation of the Sinclair ZX Spectrum, released into the wild by Spanish geniuses five years back. It hasn't had the attention the Spectrum Next has (I've also got one of them) but it works really well, even if you have to have Google Translate working overtime to figure out what's going on on the forum.
As it has a PS/2 input and VGA output, I needed to be able to handle both of them, so that's what has driven my design choices.
Why not just run an emulator on the Pi? Well, for one thing the ZX-Uno is much, much closer to the real hardware in terms of timing and capabilities - from the processor to the support circuitry, it's all recreated at an electronic level rather than in code. For another thing, this is a billion times cooler!
I'm also contemplating going a step further, and including my LattePanda in the build. Triple booting!
Other things
I might include a tiny thermal printer, for no reason other than the likes of Sharp and Epson doing portable computers in the 80s with one built in (and the DevTerm case from ClockworkPi having it as an option). For a mouse for the Pi (and LattePanda, should I go there), I've got the trackpad circuitry from the Pi-Top I won from DesignSpark, which would've been great if it weren't for the fact the keyboard was horrible and the battery management so flawed that it killed itself (and the manufacturers absolutely no help at all). I'll be using a tiny amp to drive the speakers and will probably have to create a proper mixer circuit for the two (or more) inputs.
For power, I've got a couple of ideas. I've got a USB power bank which will run the ZX-Uno and screen together happily (once I boost the voltage to 12V). It might not be able to keep more power hungry boards going for long, but we'll see. I've also got a 12V, 6A supply made by LiteOn from a decommissioned 3D printer, and that's likely to be the mains input.
Case design
I don't have anything solid yet. Form will follow function. There will be folding of some description though, and lots more threaded rods for structural support.
More to follow!